操作指南:设置 Dash0 进行分布式追踪
设置 Dash0 进行分布式追踪
Dapr 可捕获指标、链路追踪和日志,并可以通过 OpenTelemetry Collector 直接发送到 Dash0。Dash0 是一个原生 OpenTelemetry 可观测性平台,为分布式应用程序提供全面的监控能力。
配置 Dapr 追踪:使用 OpenTelemetry Collector 和 Dash0
通过使用带有 OTLP 导出器的 OpenTelemetry Collector 向 Dash0 发送数据,你可以配置 Dapr 为 Kubernetes 集群中的每个应用程序创建链路追踪,并在 Dash0 中收集它们进行分析和监控。
前置条件
- 运行中的 Kubernetes 集群,已安装
kubectl - Helm v3+
- 集群中已安装 Dapr
- Dash0 账户(开始 14 天免费试用)
- 你的 Dash0 Auth Token 和 OTLP/gRPC endpoint(可在 Settings → Auth Tokens 和 Settings → Endpoints 下找到)
配置 OpenTelemetry Collector
- 为 Collector 创建命名空间
kubectl create namespace opentelemetry
- 使用你的 Dash0 Auth Token 和 Endpoint 创建 Secret
kubectl create secret generic dash0-secrets \
  --from-literal=dash0-authorization-token="<your_auth_token>" \
  --from-literal=dash0-endpoint="<your_otlp_grpc_endpoint>" \
  --namespace opentelemetry
- 添加 OpenTelemetry Helm 仓库(仅需执行一次)
helm repo add open-telemetry https://open-telemetry.github.io/opentelemetry-helm-charts
helm repo update
- 为 Collector 创建
values.yaml
此配置:
- 通过环境变量从 Secret 中读取 token + endpoint
- 启用 OTLP 接收器(gRPC + HTTP)
- 通过 OTLP/gRPC 使用 Bearer 认证将 链路追踪、指标和日志 发送到 Dash0
mode: deployment
fullnameOverride: otel-collector
replicaCount: 1

image:
  repository: otel/opentelemetry-collector-k8s

extraEnvs:
  - name: DASH0_AUTHORIZATION_TOKEN
    valueFrom:
      secretKeyRef:
        name: dash0-secrets
        key: dash0-authorization-token
  - name: DASH0_ENDPOINT
    valueFrom:
      secretKeyRef:
        name: dash0-secrets
        key: dash0-endpoint

config:
  receivers:
    otlp:
      protocols:
        grpc: {}
        http: {}

  processors:
    batch: {}

  exporters:
    otlp/dash0:
      auth:
        authenticator: bearertokenauth/dash0
      endpoint: ${env:DASH0_ENDPOINT}

  extensions:
    bearertokenauth/dash0:
      scheme: Bearer
      token: ${env:DASH0_AUTHORIZATION_TOKEN}
    health_check: {}

  service:
    extensions:
      - bearertokenauth/dash0
      - health_check
    pipelines:
      traces:
        receivers: [otlp]
        processors: [batch]
        exporters: [otlp/dash0]
      metrics:
        receivers: [otlp]
        processors: [batch]
        exporters: [otlp/dash0]
      logs:
        receivers: [otlp]
        processors: [batch]
        exporters: [otlp/dash0]
- 使用 Helm 安装/升级 Collector
helm upgrade --install otel-collector open-telemetry/opentelemetry-collector \
  --namespace opentelemetry \
  -f values.yaml
配置 Dapr 向 Collector 发送遥测数据
- 创建配置
创建 dapr-config.yaml:
apiVersion: dapr.io/v1alpha1
kind: Configuration
metadata:
  name: tracing
  namespace: default
spec:
  tracing:
    samplingRate: "1"
    otel:
      endpointAddress: "otel-collector.opentelemetry.svc.cluster.local:4317"
      isSecure: false
      protocol: grpc
应用配置:
kubectl apply -f dapr-config.yaml
- 为你的应用程序添加注解
在每个需要 Dapr 追踪的 Deployment/Pod 中添加:
metadata:
  annotations:
    dapr.io/config: "tracing"
验证设置
- 检查 OpenTelemetry Collector 是否正在运行:
kubectl get pods -n opentelemetry
- 检查 collector 日志以确保它正在接收和转发遥测数据:
kubectl logs -n opentelemetry deployment/otel-collector
- 部署一个启用了 Dapr 追踪的示例应用程序并生成一些流量,以验证链路追踪是否正在发送到 Dash0。你可以使用 Dapr Kubernetes 快速入门教程 进行测试。
查看链路追踪
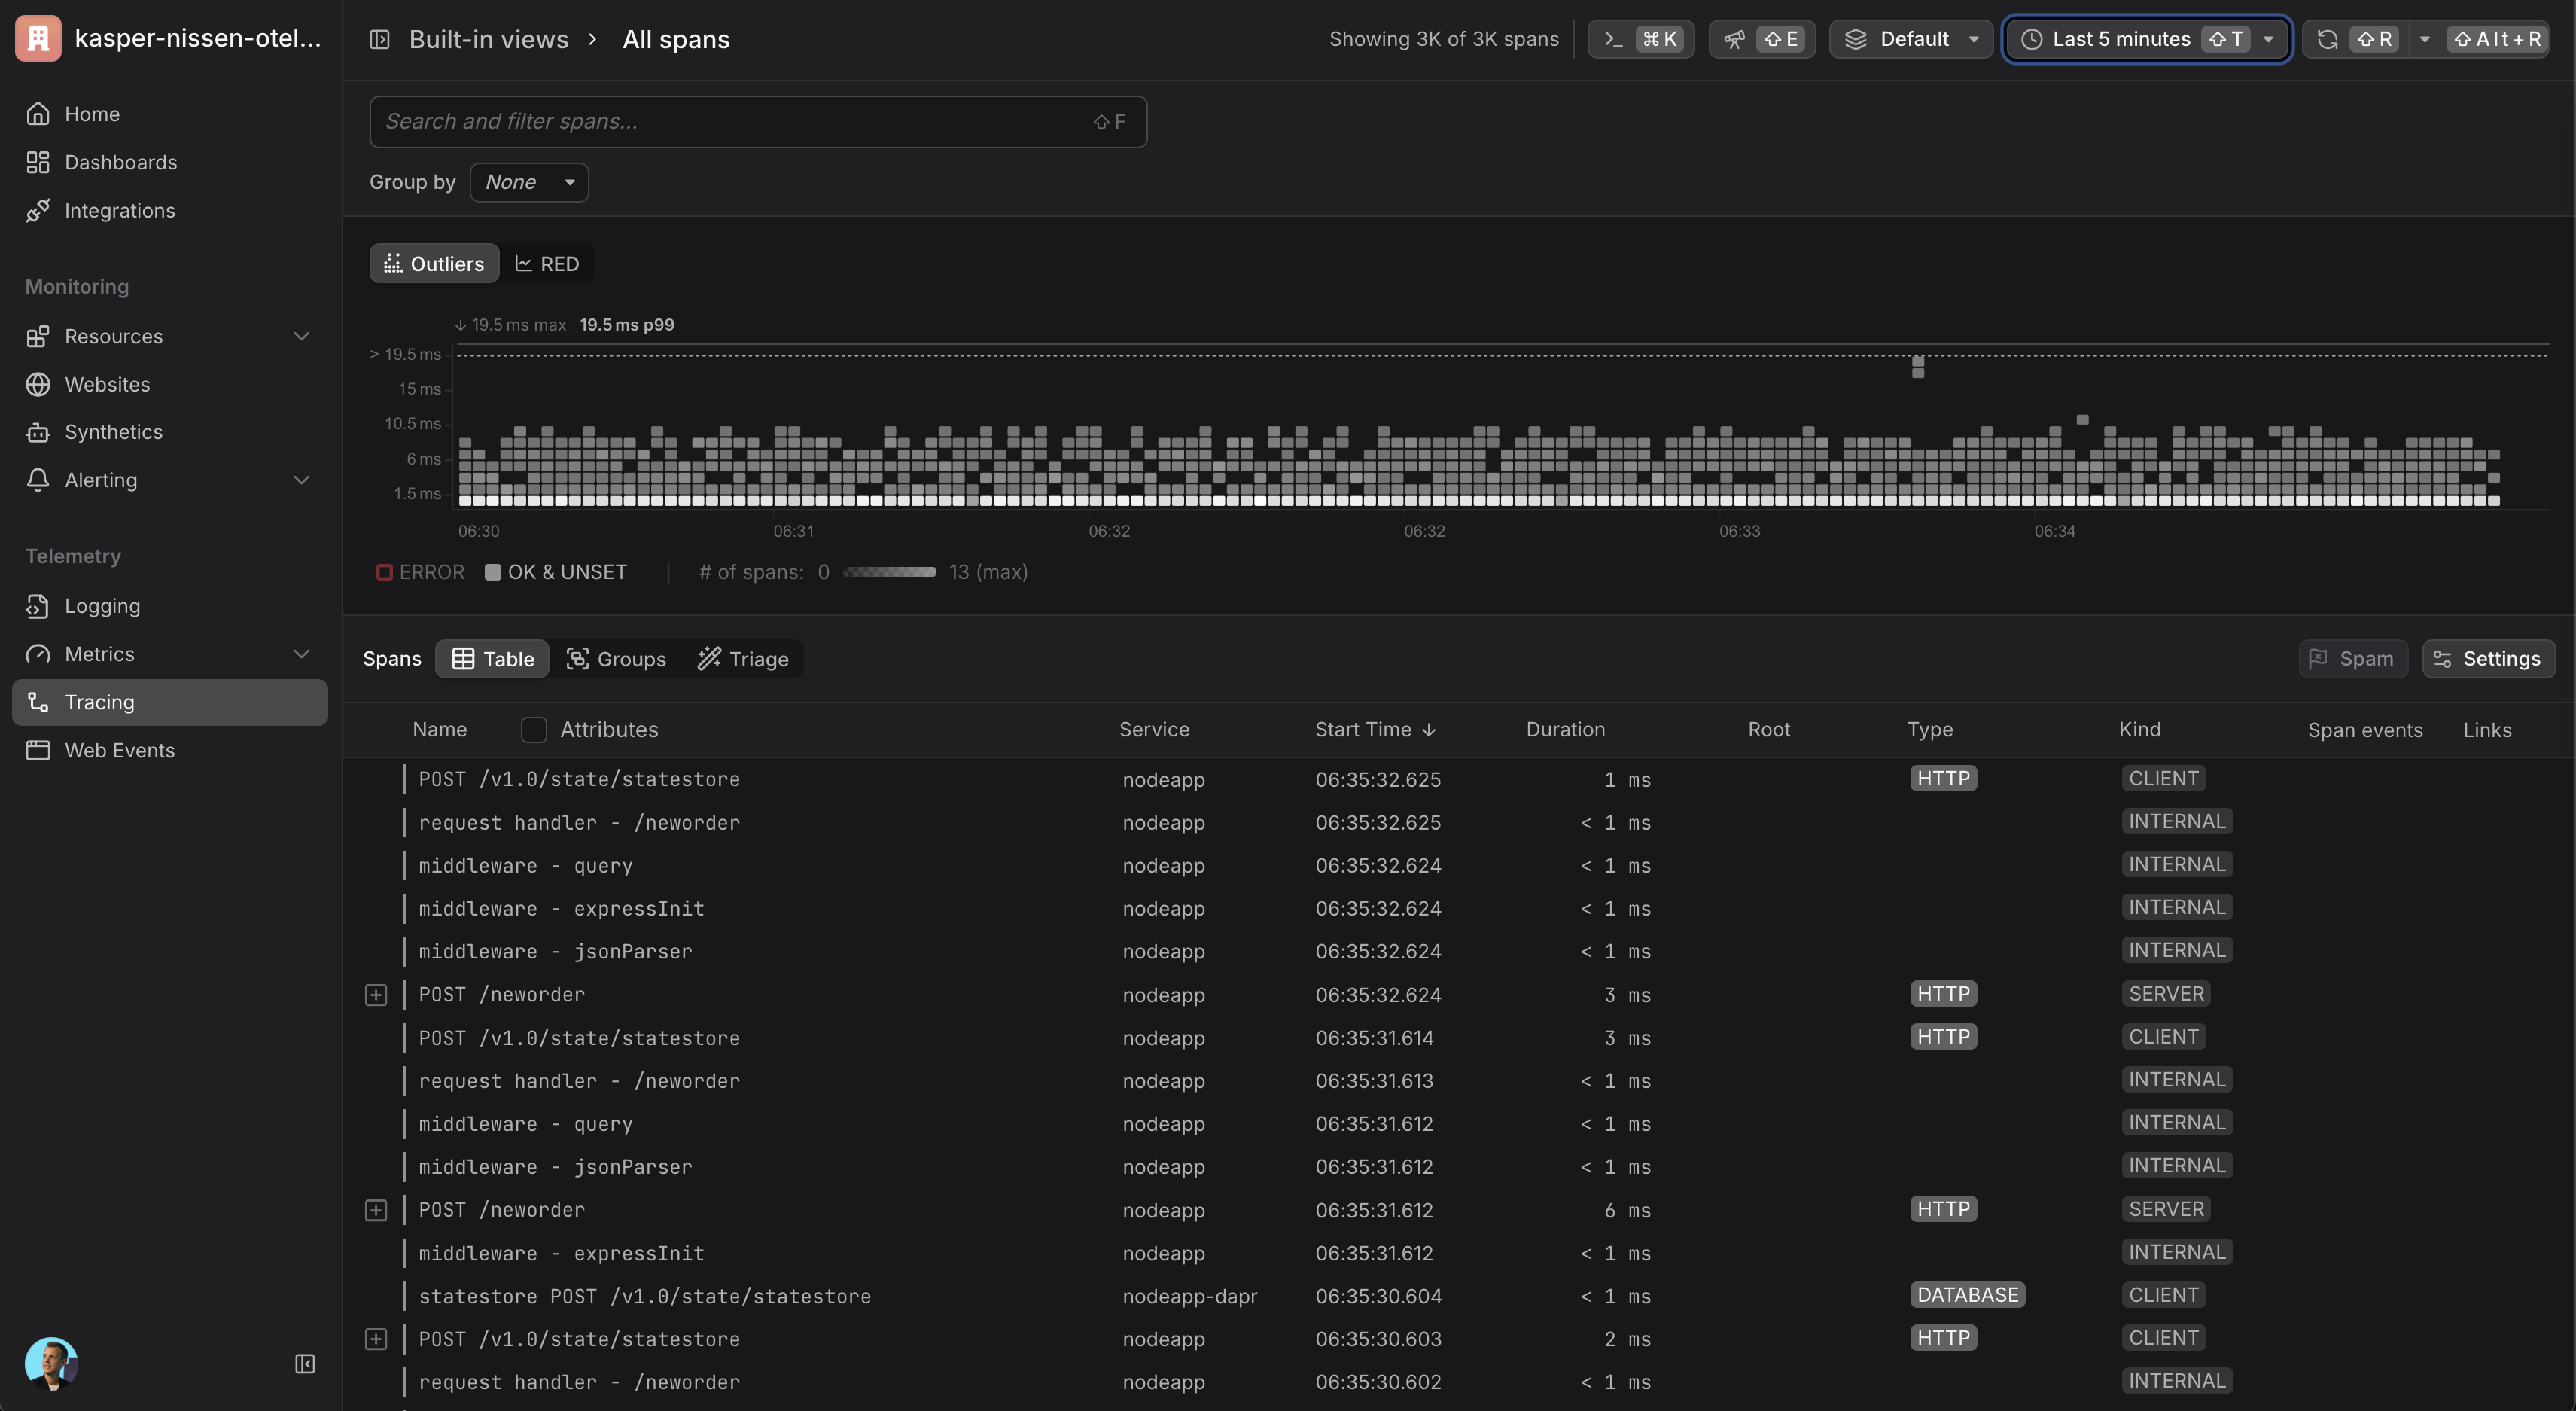
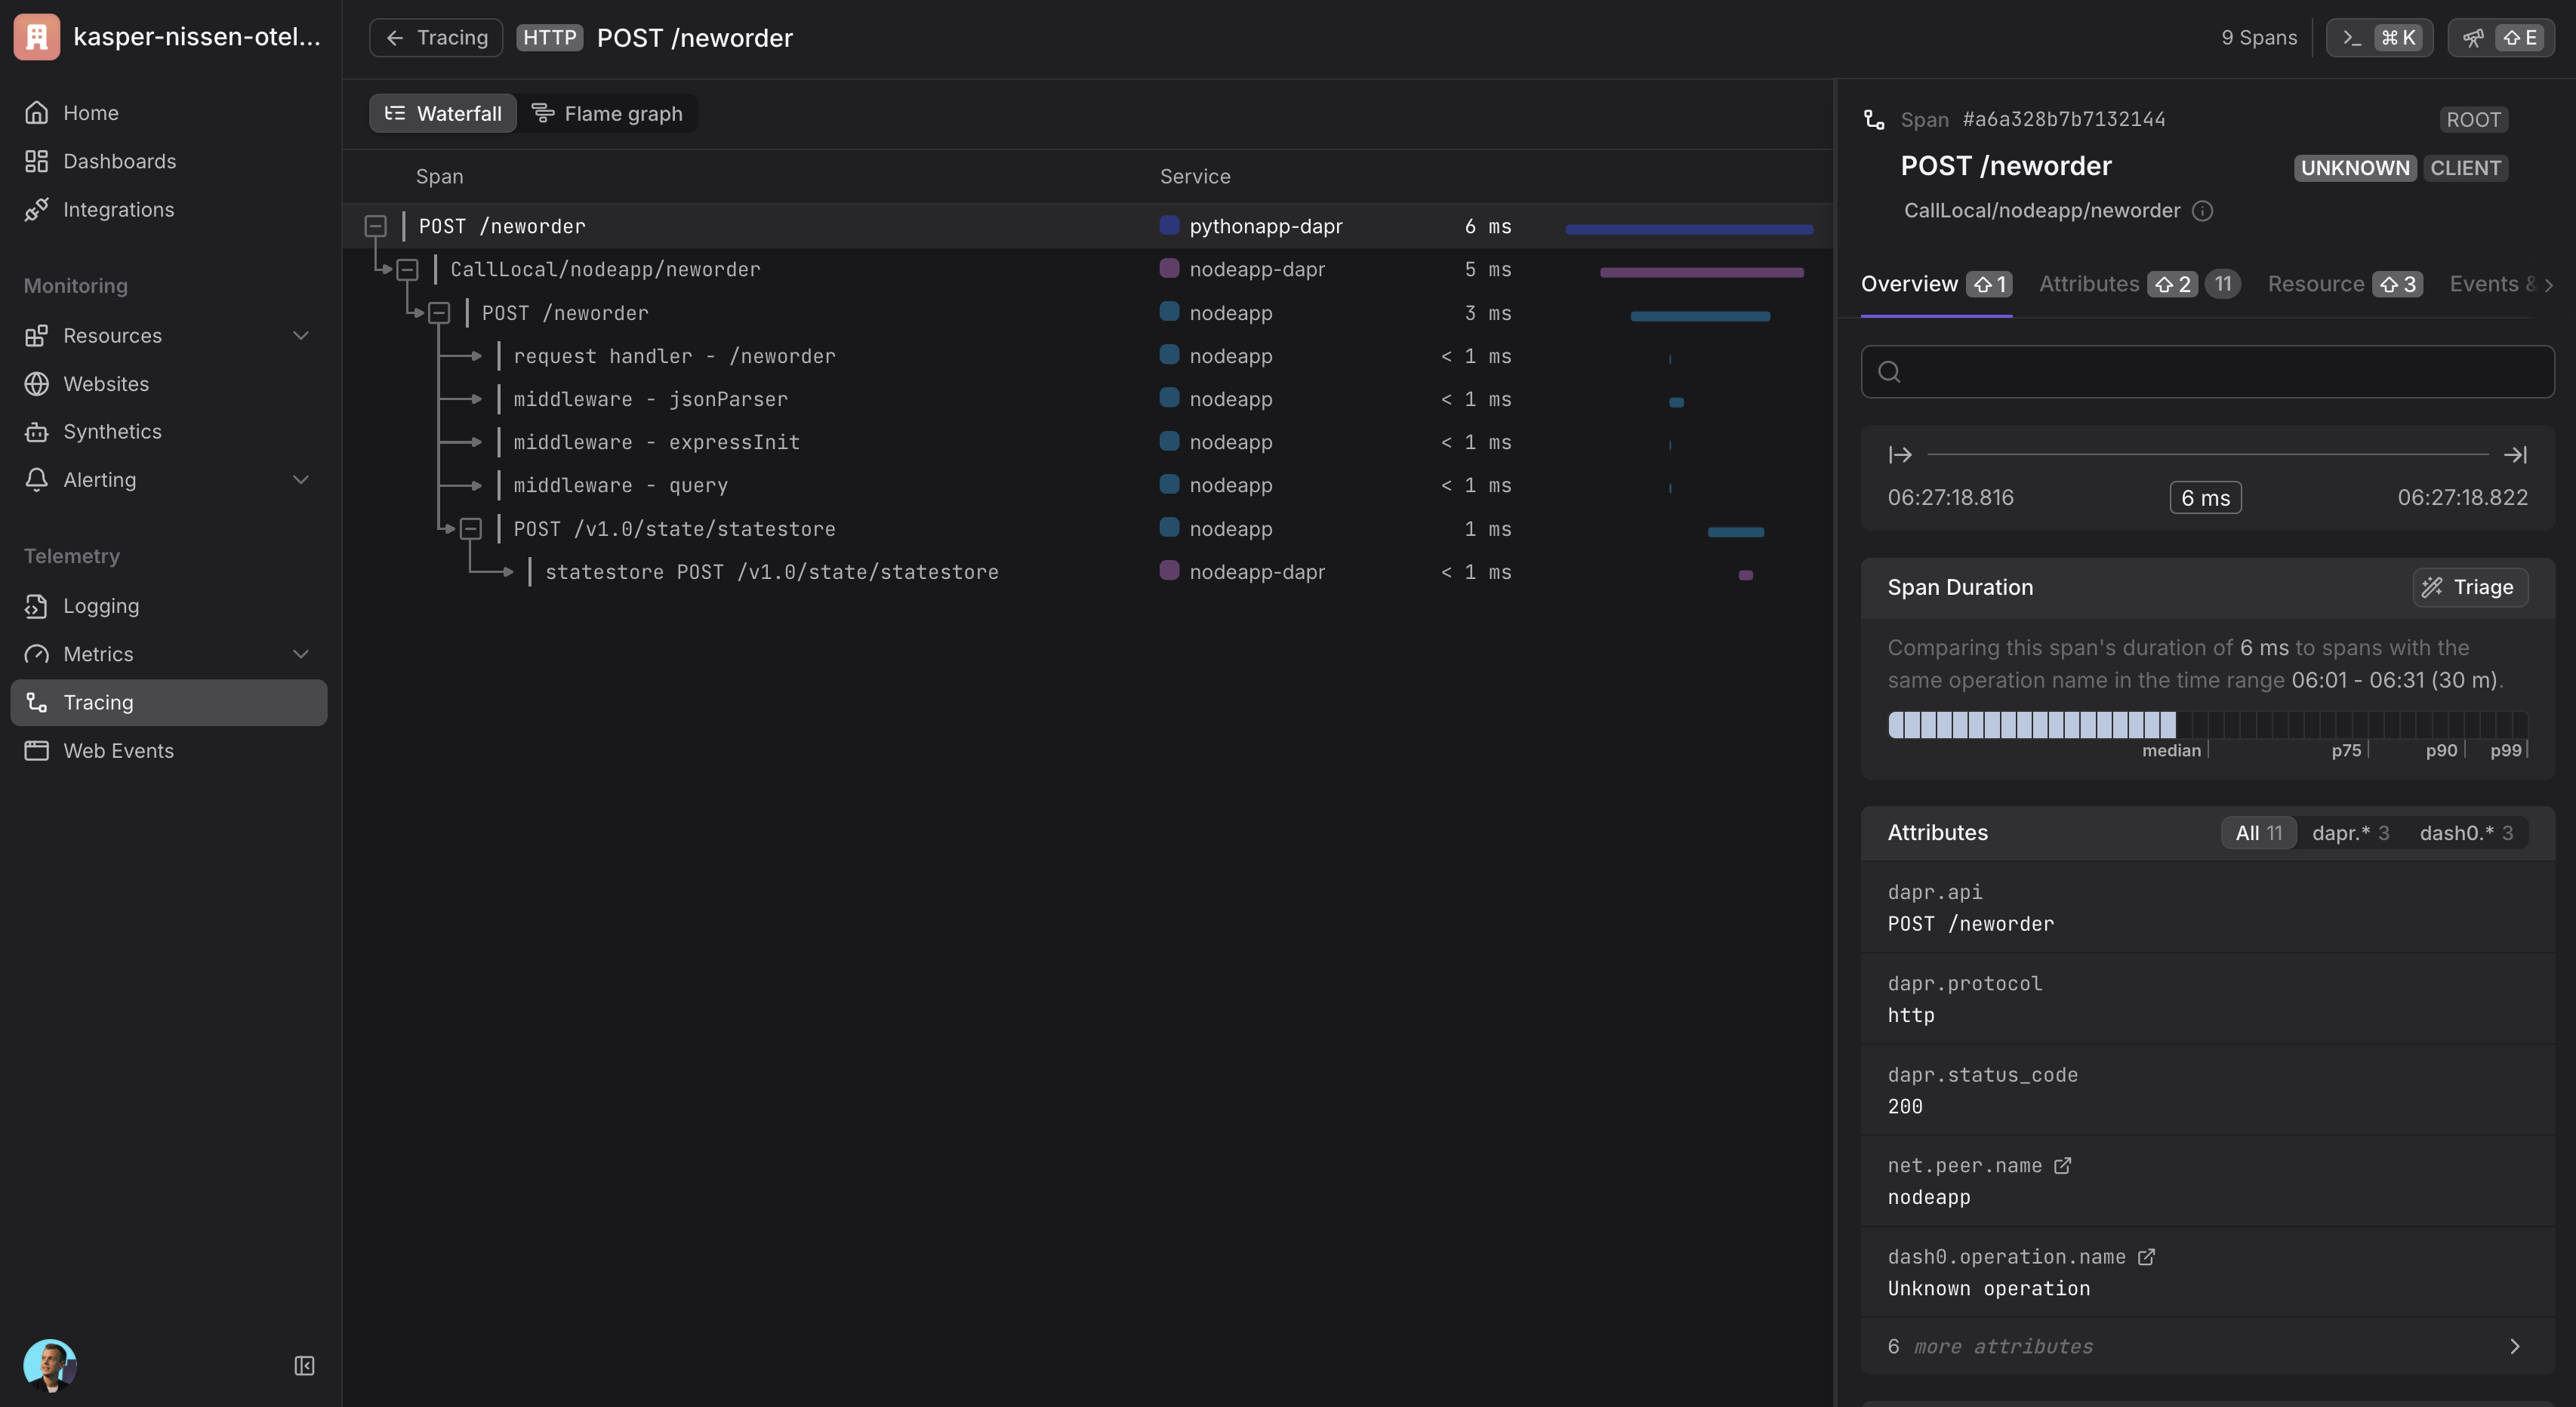
完成设置且遥测数据开始流动后,你可以在 Dash0 中查看链路追踪:
- 导航到你的 Dash0 账户
- 进入 Traces 部分
- 你应该能看到来自 Dapr 应用程序的分布式链路追踪
- 使用过滤器按服务名称、操作或时间范围筛选链路追踪
清理
helm -n opentelemetry uninstall otel-collector
kubectl -n opentelemetry delete secret dash0-secrets
kubectl delete ns opentelemetry